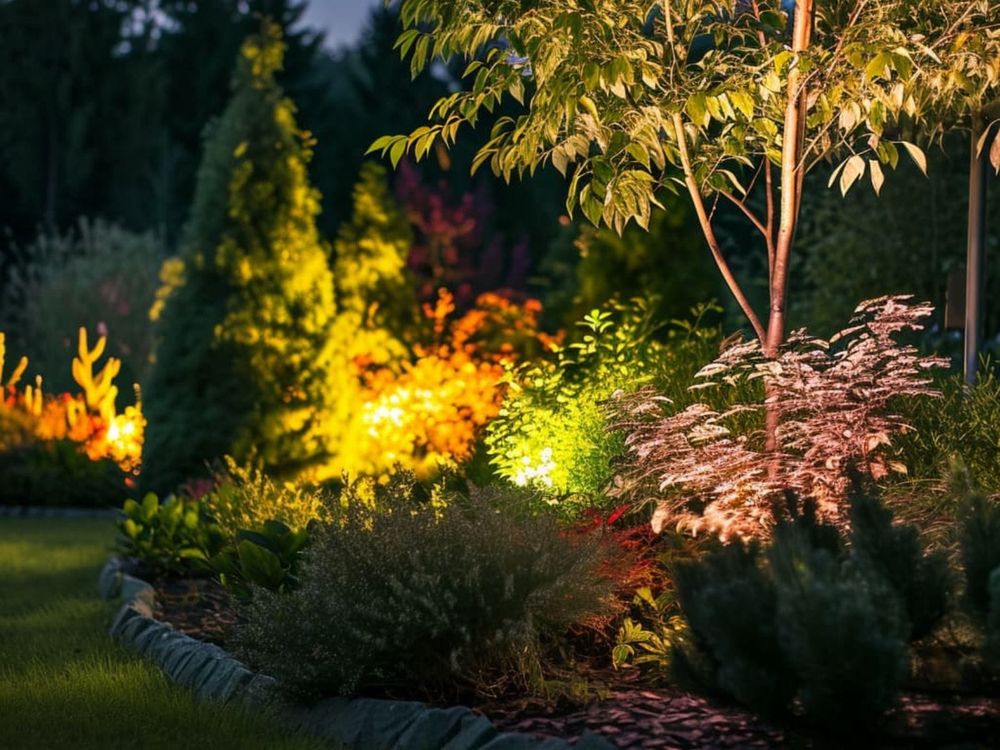
Mastering the Art of LED Landscape Lighting Design
After more than 15 years knee-deep in soil and wire, I’ve seen firsthand how thoughtfully designed LED landscape lighting can transform an ordinary yard into an enchanting outdoor sanctuary. Conversely, I’ve also witnessed how poorly planned lighting can create a disjointed, even glaring, mess that completely undermines a property’s appeal. My goal here is to share practical insights that will help you achieve the former and avoid the latter.
The Foundation: Understanding Your Landscape and Goals
Before you even think about fixtures, the crucial first step is to thoroughly survey your landscape. I always tell my clients, "Walk your property at night, with a flashlight." This simple exercise reveals existing shadows, potential trip hazards, and natural focal points that daylight often obscures. For instance, I once had a client who insisted on flooding their entire front yard with light, believing it would deter intruders. After a night walk-through, we realized a few strategically placed downlights from their mature oak trees, combined with subtle pathway lighting, provided far superior security coverage and depth, without the harsh "airport runway" effect.

Understanding your primary goals is paramount. Are you aiming for enhanced security, improved aesthetics, safe navigation, or perhaps a combination? Each objective dictates different fixture types, beam spreads, and placement strategies. For instance, highlighting a prized Japanese maple requires a narrow spot beam with excellent color rendering, while illuminating a winding garden path calls for diffused, low-glare path lights. Don’t fall into the trap of thinking "more light is better"; often, less light, artfully placed, yields far more dramatic and effective results.
Pro Tip 1: Always start with a night walk-through of the property to identify existing shadows, hazards, and potential focal points that are invisible during the day. Use a strong flashlight to simulate different lighting effects on trees, architectural features, and pathways.
Fixture Selection and Placement: More Than Just Brightness
Choosing the right fixture isn’t just about its lumen output; it’s about understanding its purpose and how it interacts with its environment. I’ve seen countless beginners make the mistake of using broad wash lights to accent a slender tree, resulting in an unflattering, over-lit spread. Instead, for a specific tree, a well-placed spotlight with an appropriate beam angle (say, 30-45 degrees) from the ground up, perhaps paired with a subtle downlight from above, can create stunning depth and highlight its natural form.
Beyond the physical fixture, paying attention to details like CRI (Color Rendering Index) and Kelvin temperature is critical. A cheap LED with a low CRI can make your vibrant green foliage look dull and unnatural, or a beautiful stone wall appear flat and monochromatic. For most landscapes, I recommend LEDs with a CRI of 80 or higher and a warm color temperature between 2700K and 3000K. This mimics natural moonlight and incandescent warmth, enhancing the natural beauty of plants and hardscapes without casting an artificial blue or harsh white glow. Imagine investing thousands in exotic plants only for your lighting to make them look sickly; it’s a common oversight that excellent quality fixtures prevent.
Powering Your Vision: Transformers, Wiring, and Controls
The electrical backbone of your system is where many DIY projects encounter major pitfalls. Proper transformer sizing is non-negotiable. You must calculate the total wattage of all your fixtures and select a transformer that can handle at least 20-25% more than that sum. This overhead is crucial for future expansion and prevents your transformer from running at maximum capacity constantly, which drastically shortens its lifespan. I’ve been called out to properties where lights at the end of a run were noticeably dimmer than those near the transformer—a classic sign of voltage drop due to either an undersized transformer or, more commonly, using wire that’s too thin for the length of the run and total wattage.
Wiring techniques are equally important. Always use direct burial rated, low-voltage cable (typically 12 or 10 gauge for longer runs) and invest in high-quality, waterproof connectors. Those cheap push-on connectors found in basic kits are notorious for failing after a season or two, leading to intermittent outages and frustrating troubleshooting. I swear by robust, silicone-filled wire nuts or heat-shrink connectors for reliable, long-term connections that withstand the elements.
Pro Tip 2: Over-spec your transformer by at least 20-25% beyond your calculated total fixture wattage. This buffer accounts for voltage fluctuations, future additions, and significantly extends the lifespan of your transformer by preventing continuous peak load operation.
The Art of Illumination: Techniques and Aesthetics
This is where design truly becomes an art. Understanding different lighting techniques allows you to sculpt your landscape with light, creating mood and depth. Up-lighting from the base of a tree makes it a dramatic focal point, while down-lighting (often called "moonlighting") from an elevated fixture in a tree canopy creates beautiful, dappled shadows that simulate natural moonlight. Silhouetting, where a fixture lights a backdrop behind an object, creates a stark, dramatic outline, perfect for interesting architectural elements or sculptural plants.
The key here is layering. Don’t just point lights; think about how different elements interact. Use a mix of techniques and varying light intensities to create visual interest. Avoid the "runway effect" of evenly spaced, identical path lights. Instead, stagger them, vary their intensity slightly, and consider pairing them with a subtle wash light on nearby foliage to soften the edges. I once redesigned a client’s driveway that was lined with uniform, bright path lights. By replacing every other path light with a softer, wider spread, and adding a few discreet uplights on nearby shrubs, we transformed a stark pathway into an inviting, integrated part of their landscape.
Pro Tip 3: Start with your primary focal points, then layer in accent lighting, and finally address safety/pathway illumination. This builds a cohesive scene rather than a collection of individual, disconnected lights.
Key Design Considerations
- Light Temperature (Kelvin): Match the natural feel of your landscape; usually 2700K-3000K for warmth.
- Beam Spread: Select appropriate angles (narrow spot, wide flood) for the object being lit.
- Color Rendering Index (CRI): Aim for CRI 80+ to ensure natural, vibrant colors.
- Glare Control: Position fixtures to avoid shining directly into eyes, or use shielded fixtures.
- Fixture Material and Durability: Invest in brass, copper, or high-grade aluminum for longevity in outdoor conditions.
- Scalability for Future Expansion: Plan wiring and transformer capacity for potential additions.
- Energy Efficiency and Zoning: Group lights onto separate zones for flexible control and energy savings.
Common Mistakes to Avoid
- Over-lighting: Too many fixtures or lights that are too bright create a harsh, unnatural look.
- Ignoring Glare: Unshielded or poorly aimed fixtures can create blinding hot spots, ruining the ambiance.
- Incorrect Fixture Placement: Placing path lights too close to the path, creating bright circles instead of functional illumination.
- Under-sizing Transformers or Using Too Thin Gauge Wire: Leads to voltage drop, dim lights, and system failure.
- Not Considering Plant Growth: Lights placed too close to small plants will eventually be obscured or overgrown.
- Using Poor Quality, Non-Weatherproof Connectors: Causes shorts, corrosion, and intermittent outages.
- Failing to Draw a Detailed Plan: "Winging it" often results in wasted materials, poor coverage, and frustration.
FAQ Section
How do I choose the right color temperature for my landscape?
For a warm, inviting, and natural look that complements most plant life and hardscapes, I typically recommend LED color temperatures between 2700K and 3000K. This range mimics traditional incandescent bulbs and moonlight. If you’re going for a crisper, more modern aesthetic, you might consider 3500K, but anything higher can start to look sterile or bluish in a residential landscape setting. Always test a few samples in your actual landscape at night to see what you prefer.
What is voltage drop and how can I prevent it?
Voltage drop is the loss of electrical pressure (voltage) as electricity travels along a wire, primarily due to the wire’s resistance and the length of the run. It results in dimmer lights at the end of a long circuit. You can prevent it by using thicker gauge wire (lower gauge number equals thicker wire, e.g., 10-gauge is thicker than 12-gauge), keeping wire runs as short as possible, and distributing your light fixtures evenly across multiple wire runs originating from your transformer rather than one long, heavily loaded string.
Should I hire a professional or do it myself?
For small, straightforward projects like lighting a single pathway or a couple of trees, a DIY approach can be rewarding and cost-effective. However, for larger properties, complex designs involving multiple zones, intricate lighting effects, or if you’re unsure about electrical principles like voltage drop and load balancing, hiring a seasoned professional is usually the wiser investment. A good designer brings experience in aesthetics, electrical engineering, and long-term durability, often saving you money and frustration in the long run by avoiding costly mistakes and delivering a superior, tailored result.